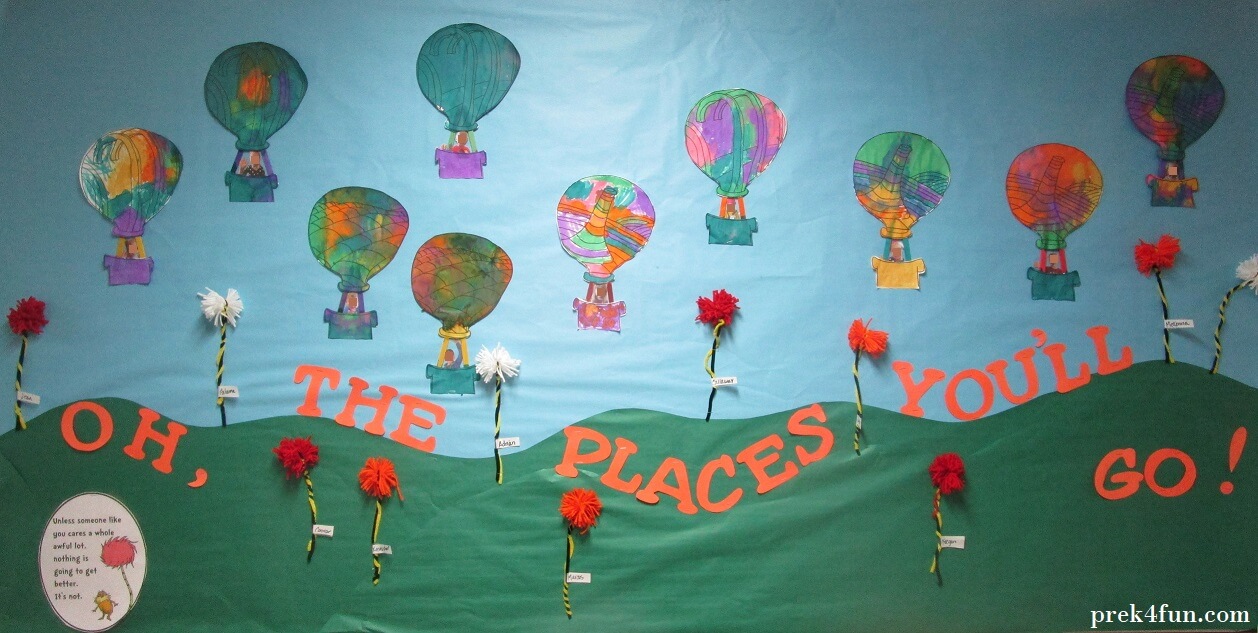
Happy Birthday Dr. Seuss inspired our March Bulletin Board. I started by using patterns from the classic Oh The Places You’ll Go illustrations to create the Hot Air Balloons. This fun activity was very easy to do and the Frogs really loved mixing the colors. Lets get started!

Watercolor Dr. Seuss Inspired Hot Air Balloons
Supplies Needed:
- white copy paper
- black sharpie
- (2) colored Popsicle sticks
- watercolor paints
- Q Tips (optional)

I started by using a black sharpie tracing three different patterns from Oh The Places You’ll Go onto white paper. I have only ten students so I made 4 copies of each design. I love to incorporate the letter of the week into our projects for this reason we painted with Q Tips in Watercolors in Rainbow Colors. The Q tips also made the children slow down when painting and really try to fill in the pattern with as many colors as possible. Due to time and the age of my Frogs I cut the balloon shape out and taped two colored Popsicle sticks to attach the balloon to the basket. To finish I took a photo of them waving that I then added to the balloon with tape.

Yarn Ball Truffula Trees

Supplies Needed:
- Pipe Cleaners (yellow and Black)
- Yarn
- cardboard
- scissors

The bottom of our March Dr. Seuss Bulletin Board was a Forest filled with Truffula Trees form The Lorax! Due to the age of my class I set it up in three stages so the could do a bit of each part, but really it was to much for them to complete c on their own. Using a small piece of cardboard I cut a square with a 2″ space in the middle. To start you Spin the yarn around until you get the thickness you like. then tie the yarn together in the center as tight as you can.

Next I had the Frogs set aside the yarn wrap and twist two pipe cleaners together. When Finished we attached the yarn to the pipe cleaners by twisting the top around the center of the yarn as tight as possible.

Then using the scissors the frogs cut the yarn in the middle of each side to create the “ball” look. Due to the age of my class I made many yarn balls at each stage so they could do all three steps without getting overwhelmed, this way they experienced the entire process.
